Menu Item Groups is a great new feature that adds further flexibility and customization to your menu. Menu items can be grouped together under one menu button allowing further organization and easier accessibility. This feature is particularly useful for bars and pizza shops.
How It Works
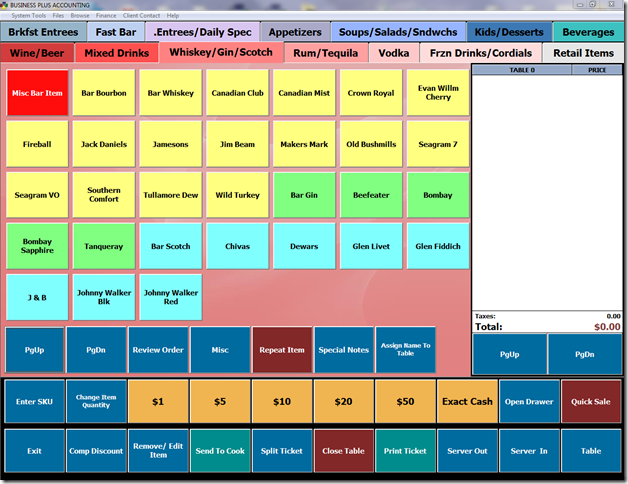
Below we have an example of an alcohol menu. As you can see, drinks are grouped together by color and liquor type. This works well until you add too many buttons on one menu.
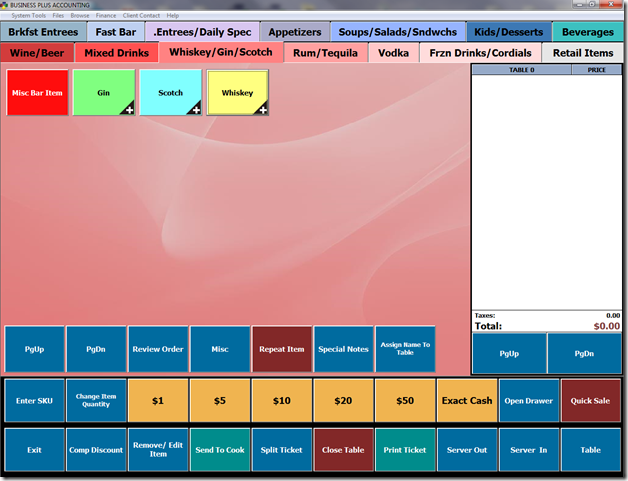
Below, we see the same menu with the menu item group functionality implemented. We now have one button for each liquor type with a plus symbol indicating it is a menu item group.
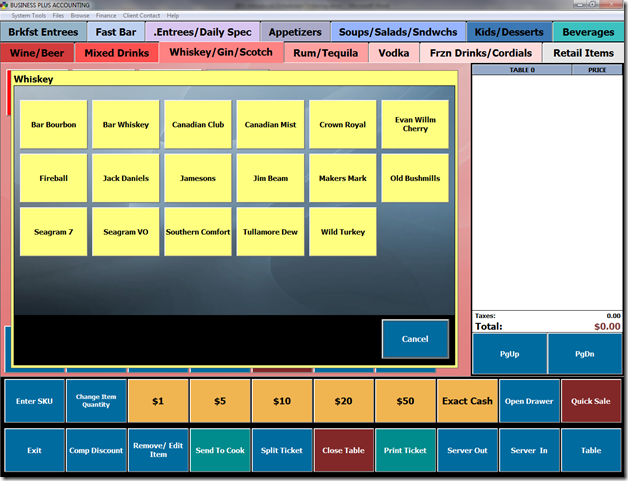
When we click the Whiskey button we get a popup menu with all of the original menu items that were on our original menu. These menu items have all the same flexibility with modifiers, side lists, and special pricing that they would have if they were directly placed on a menu tab. As you can see, this allows you to better organize your menu and effectively use valuable menu space.
Setup
Setting up menu item groups is a simple process. Before you get started you will need to make sure your BPA software is up to date. You must have a software update applied 11/12/13 or later to take advantage of this functionality. Please contact Business Software Solutions to receive an update. As a reminder, updates are free of charge to customers who are current on their monthly license and support fees.
To set up a new group, follow these simple instructions:
- 1. Open BPA and navigate to Restaurant System > Manager Functions > Define Menu Items.
- 2. Select Modify to add an existing menu button to a group or select Add to add a new menu item.
- 3. Under Menu Item Options select the New Group button.
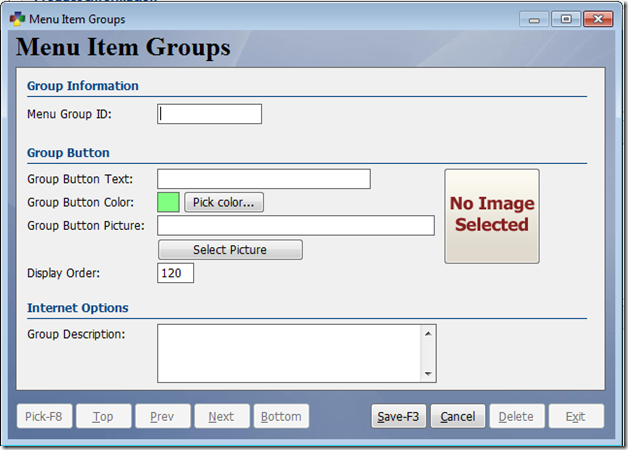
- 4. Enter a Menu Group ID and the Button Text for the group. You may also assign a color, picture, and display order number if you desire. Press Save when you are finished.
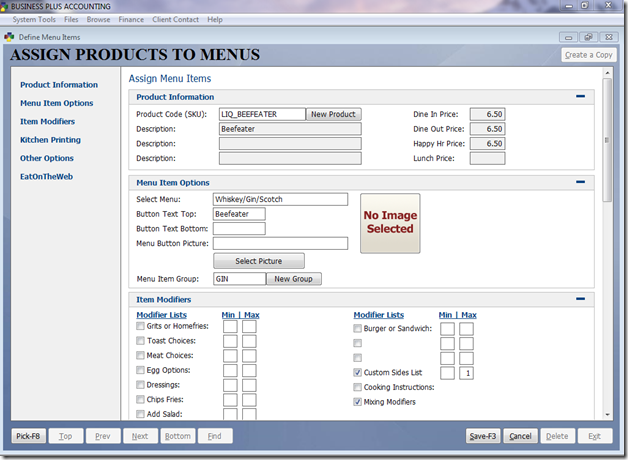
- 5. Press Save to save the menu item. The group button will automatically be created on the menu you have assigned to the menu item.
- 6. Press the Pick button to select another menu item to add to the group or press Add to add a new menu item.
- 7. Click in the box next to Menu Item Group and press F8 on the keyboard. You may now select the group that you created in the previous step.
- 8. Continue adding menu items to the group in this fashion. You may add as many and 24 menu buttons to a group in the Restaurant Professional software and 16 in the Delivery Professional software.